Setting up federated login for LogMeOnce using Azure includes setting up Azure Identity Provider in LogMeOnce and Configuring LogMeOnce application in Azure.
Using federated login for LogMeOnce enables users to log in to LogMeOnce using their Active Directory or Azure AD using their corporate password. To use Azure AD federation a Premium tier subscription for Microsoft Azure Active Directory is required.
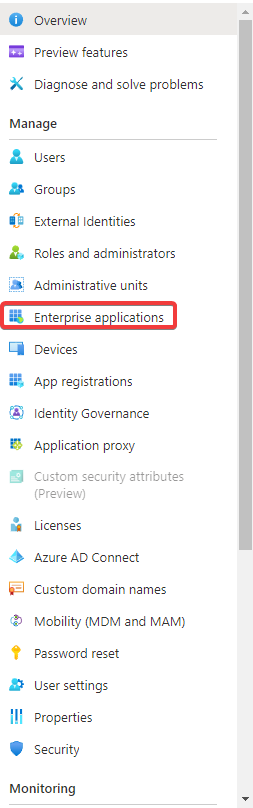
Add Azure Enterprise Application
This section will create a new Enterprise Application in Azure, it will be fully configured for LogMeOnce in the next section.
- Open Azure Active Directory
As an administrator log in to your Azure AD account.

- Click on “Enterprise Applications”
- Click “New Application”

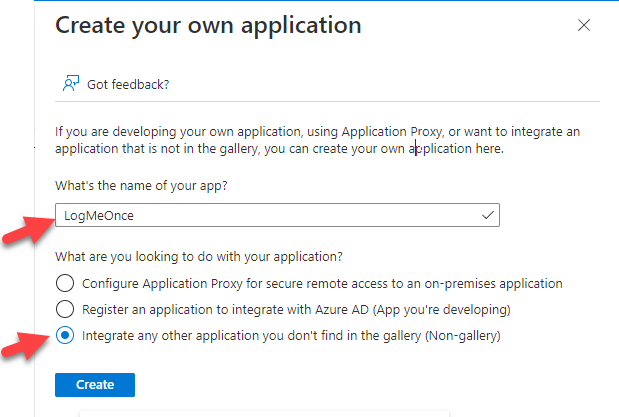
- Click “Create your own application”
- Give the application a name, example “LogMeOnce”
- Select the “Integrate any other application you don't find in the gallery (Non-gallery)” Radio Button
- Click Create
Note: Creation can take several seconds, go back to Azure Active Directory -> Enterprise Applications and find the Enterprise App with the name example LogMeOnce.
Configure the Enterprise Application for Single Sign On
Here we will configure both the Azure Enterprise Application for Single Sign On but also configure LogMeOnce with the necessary information from Azure AD
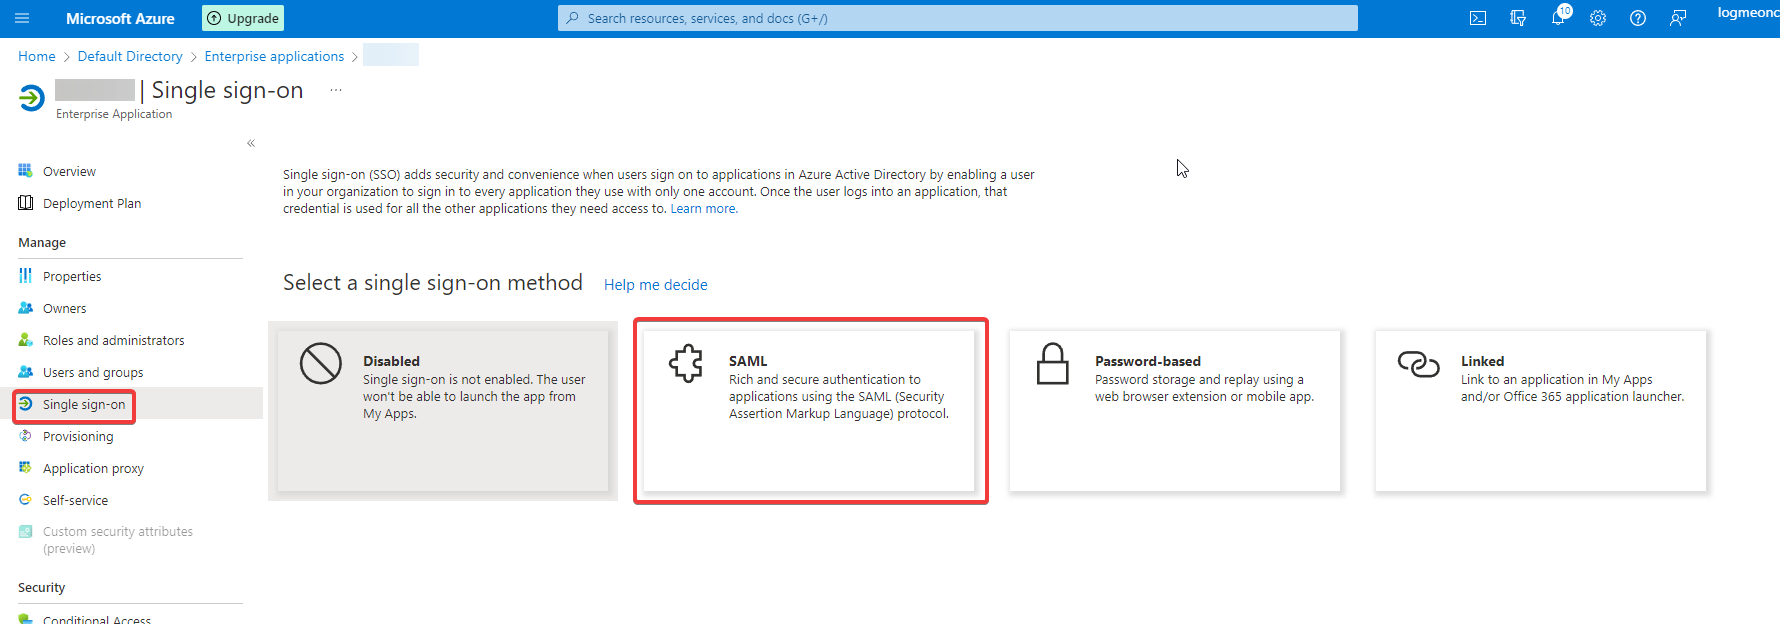
- Click on Single Sign-on on the left, and then select SAML on the next step
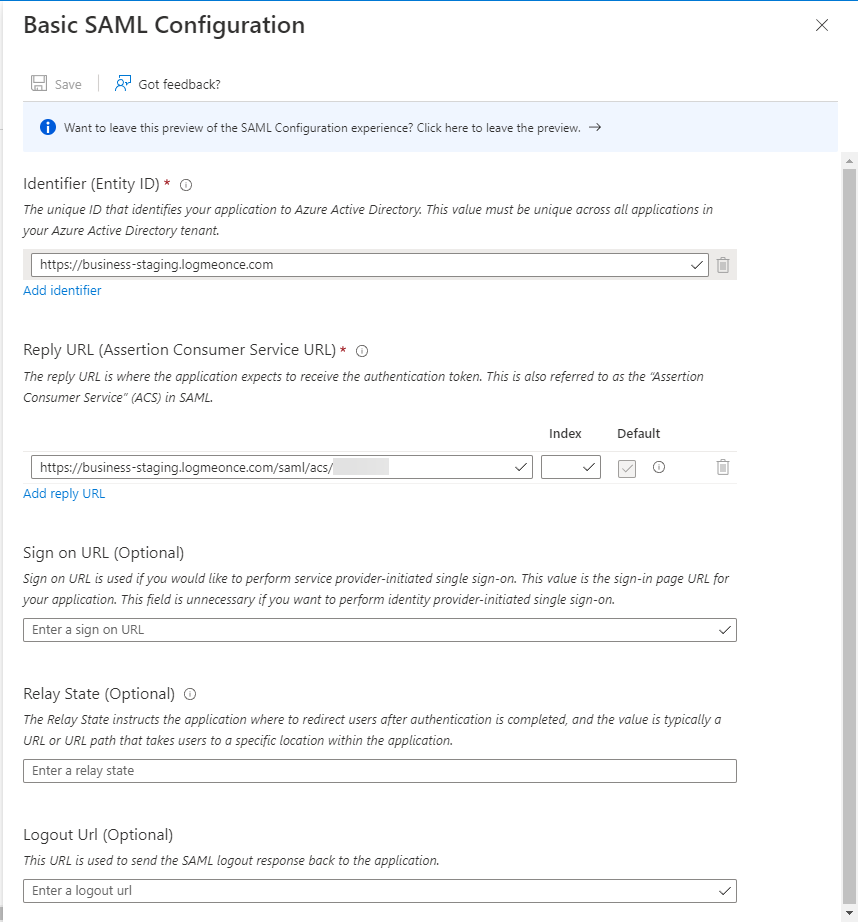
- Basic SAML Configuration, click Edit
- Copy the LogMeOnce “Service Provider Entity ID URL” into the Azure “Identifier (Entity ID)”
- Copy the LogMeOnce “Assertion Consumer Service URL” into the Azure “Reply URL”
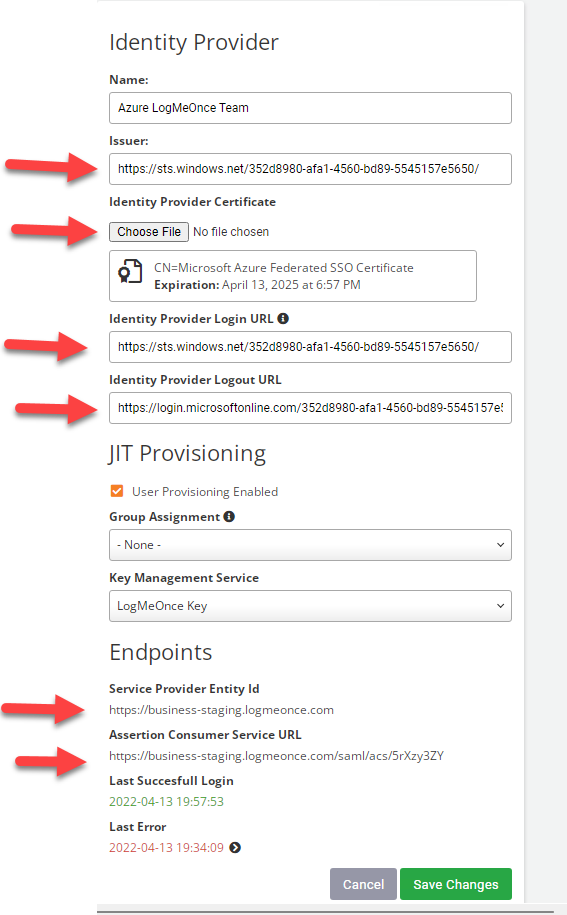
LogMeOnce Identity Provider screen is shown below:
Azure AD Identity Provider Screen is shown below:
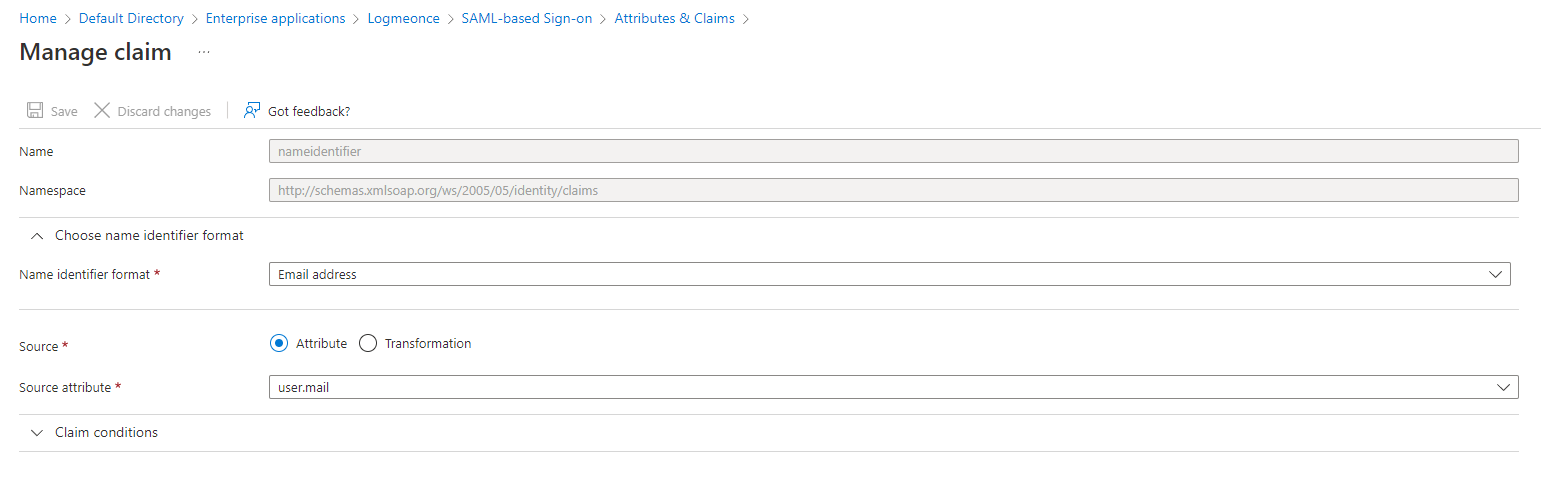
- Attributes & Claims click on Edit
- Click on the only Required Claim to edit
- Change the Source Attribute to user.mail
- Click Save
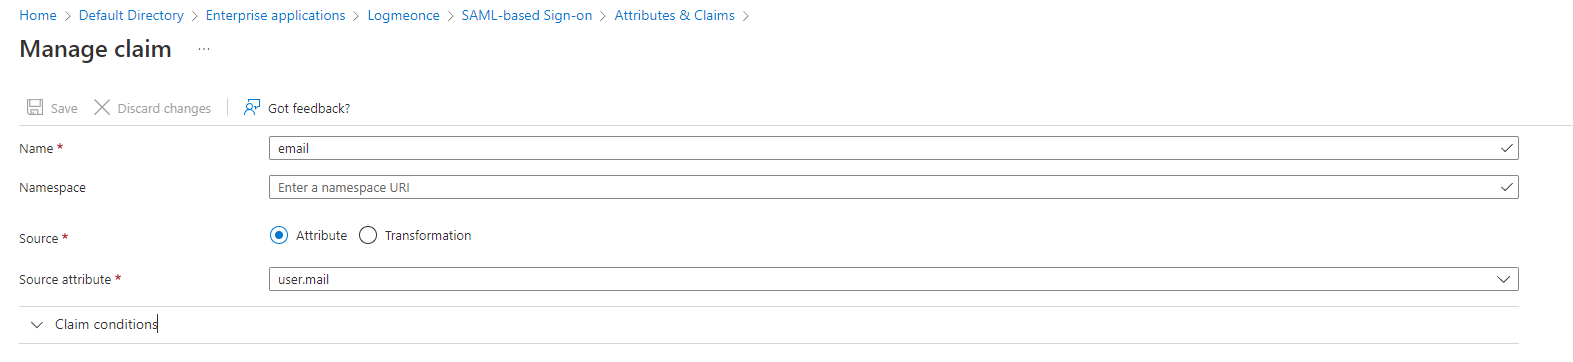
- Change the additional claims one by one and remove the Namespace completely and edit the claims to look like the following. The list of attributes to map and additional information are provided in this reference document. How to Create SAML Identity Provider (IdP)
Remember to hit Save after each edit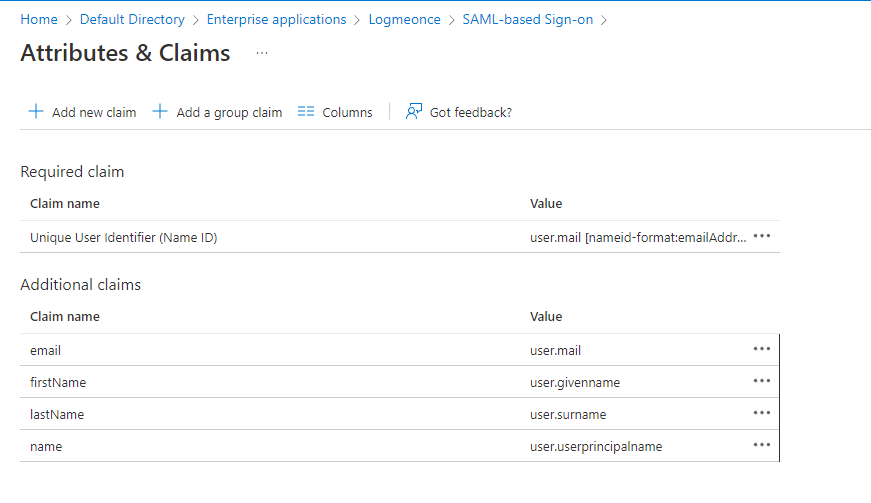
- Click on the only Required Claim to edit
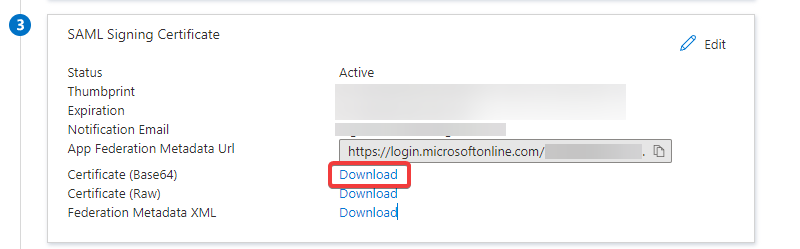
- SAML Signing Certificate
- Click Download for the “Certificate (Base64)
- Upload this Certificate into the LogMeOnce “Identity Provider Certificate”
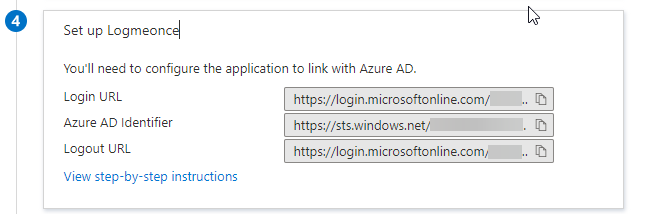
- Set up LogMeOnce, Copy the provided URLs from Azure into LogMeOnce
- Azure “LoginURL” is the LogMeOnce “Identity Provider Login URL”
- Azure “Azure AD Identifier” is the LogMeOnce “Issuer”
- Azure “Logout URL” is the LogMeOnce “Identity provider Logout URL”
Add Permissions to the Azure Enterprise Application
The Azure Enterprise Application needs permissions before any user can attempt the first Single Sign On login.
- In the Enterprise Application, click Users and groups
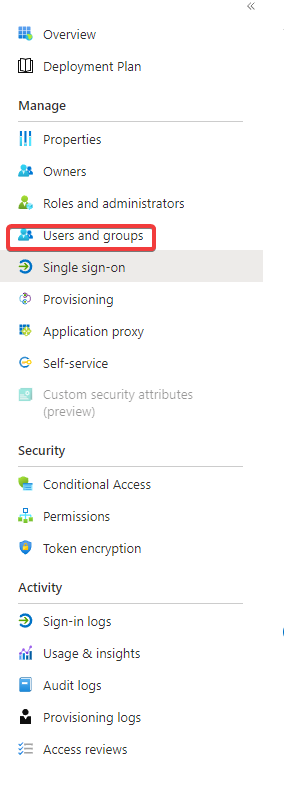
- Click Add users/group

- Select either an Azure AD Security group, or individual Azure AD users who should have permissions to sign into LogMeOnce
Testing the Single Sign On
Configuration is completed, SSO can now be tested. If this is the first time a user signs into LogMeOnce a new user will be created automatically in LogMeOnce
- In the Enterprise Application go back to Single Sign On
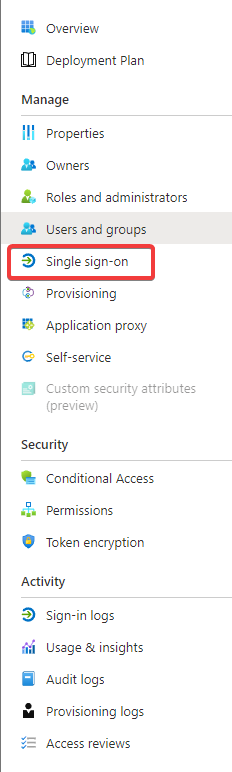
- At the bottom for Step 5 “Test single sign-on" click on Test
- The current user needs to have been added to the list of users in the Enterprise Application in the previous section “Add Permissions to the Azure Enterprise Application”
Click “Test sign in” 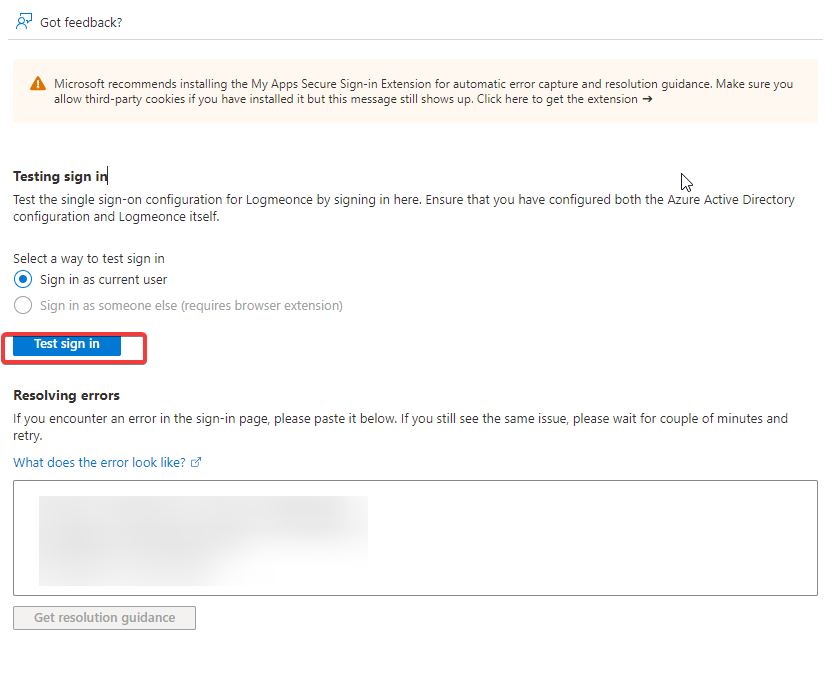
- Sign in should log you directly into LogMeOnce
| Helpful Articles | How to Create SAML Identity Provider (IdP) |
Comments
Article is closed for comments.